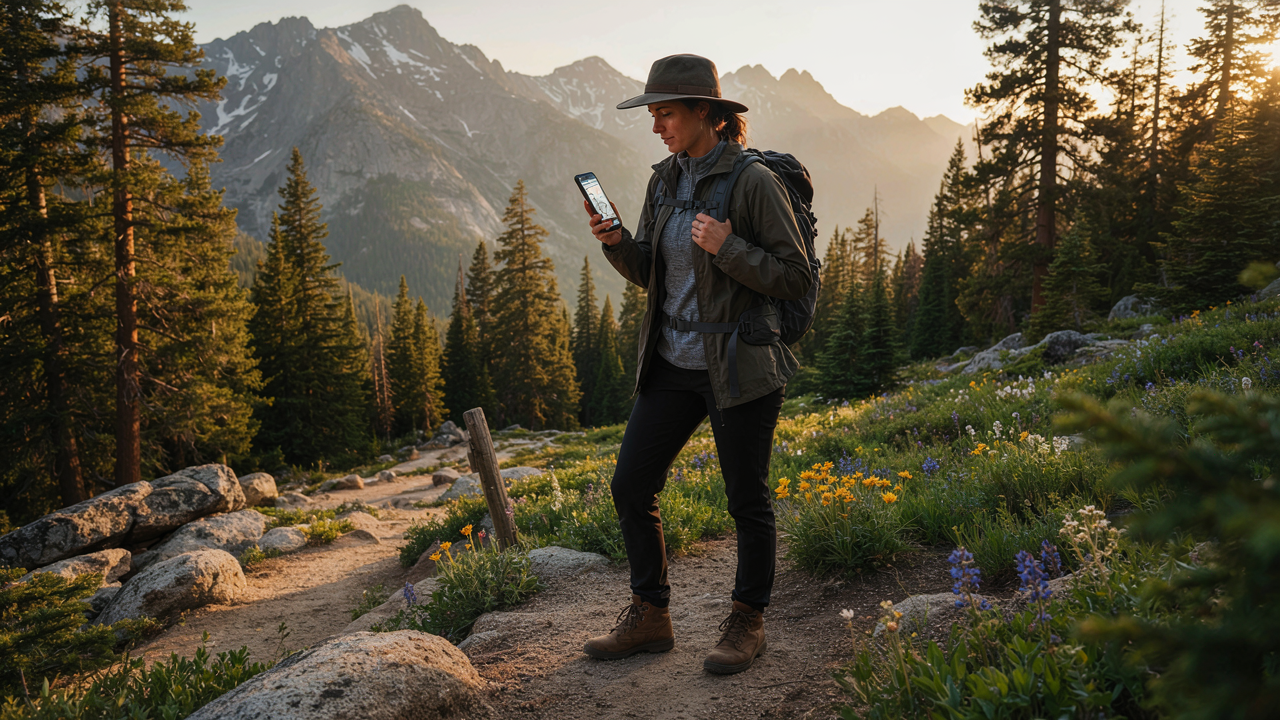
Planning a great hike is about more than finding a trail on a map. You also need to know the distance, elevation, difficulty, parking options, route details, and what conditions you may face along the way. That is where Hiking Project can make outdoor trip planning easier. It gives hikers a practical way to discover trails, explore routes, view maps, and prepare for adventures across the United States.
Whether you are a beginner searching for an easy nature walk or an experienced hiker looking for a challenging mountain adventure, Hiking Project can help you compare trails and choose an option that fits your goals. In this guide, you’ll learn how to use Hiking Project effectively, find better trails, plan safer hikes, use offline maps, avoid common mistakes, and get more value from this popular hiking resource in 2026.
Quick Answer
Hiking Project is a free, community-built hiking trail guide and mapping resource designed to help hikers discover, research, and plan outdoor adventures. It provides trail maps, recommended routes, descriptions, photos, elevation information, difficulty ratings, and other planning details.
The platform currently lists more than 282,000 miles of hiking trails across more than 86,000 trails, covering destinations throughout the United States. Its mobile app can also provide offline access to downloaded trail information, which can be especially useful in areas with limited cell service.
For U.S. hikers, the biggest advantage is simple: instead of searching dozens of websites for trail ideas, you can use one hiking-focused resource to compare routes, understand difficulty, look at maps, and build a better plan.
Quick takeaway: Hiking Project is best used as a trail discovery and planning tool, not as your only source of safety information. Always verify current closures, weather, permits, hazards, and local regulations with the land manager before hiking.
What Is Hiking Project and How Does It Work?
Hiking Project is a digital trail guide created around information contributed by hikers and outdoor enthusiasts. The platform combines maps with route descriptions, photos, trail information, and community contributions.
The site separates individual trails from recommended routes. A trail represents a specific trail segment, while a recommended route can combine one or more trails into a complete hike. Recommended routes can include information such as descriptions, photos, parking, fees, and notable highlights.
This distinction is useful because a trail on a map does not always tell you how to build a complete hiking day. A recommended route can provide more context about how different trail sections fit together.
How Hiking Project Helps Hikers
You can use Hiking Project to:
- Find hiking trails near a destination
- Explore trails by state or region
- Compare hiking distances
- Check elevation gain
- Review difficulty levels
- Study trail maps
- Read route descriptions
- Look at photos
- Find recommended routes
- Save useful information
- Download areas for offline use
- Contribute trail information and photos
The platform’s current directory covers hiking destinations across virtually every U.S. region, from Arizona and Colorado to New York, Washington, California, Texas, and beyond.
25 Smart Ways to Use Hiking Project for Better Adventures

Search for Trails Before Your Trip
Start planning before you reach the trailhead. Search the destination and review several possible routes instead of choosing the first result you see.
Compare distance, elevation gain, difficulty, route type, scenery, and available descriptions.
This makes it easier to select a hike that matches your time and experience.
Compare Hiking Distance
Mileage matters, but it should never be the only factor.
A three-mile trail with substantial elevation gain can require more effort than a longer, relatively flat route.
When comparing hikes, look at:
- Total distance
- Elevation gain
- Elevation profile
- Trail surface
- Route type
- Expected weather
- Your group’s experience
Check Elevation Gain
Elevation gain tells you how much climbing a hike involves.
For example, two trails could both be five miles long but feel completely different if one climbs hundreds of feet more than the other.
If you’re new to hiking, don’t automatically choose a route based on mileage alone.
Read the Full Route Description
A map gives you geography. A good description gives you context.
Look for information about:
- Trail junctions
- Parking
- Water crossings
- Scenic viewpoints
- Steep sections
- Route direction
- Seasonal considerations
- Access information
Still, treat community information as a starting point. Conditions can change after a route was submitted.
Study the Map Before Leaving
Don’t wait until you’re standing at the trailhead to figure out the route.
Open the map and identify:
Trailhead
Main route
Junctions
Turnaround point
Alternate trails
Nearby roads or access points
Understanding the route beforehand can make navigation easier.
Download Maps for Offline Use
One of Hiking Project’s most useful features is offline access.
The mobile app is designed to work without cell service after relevant areas are downloaded. Hiking Project’s help center recommends downloading an area through the app’s Manage Areas function and checking that the information works before leaving connectivity behind.
A simple test is to switch your phone to airplane mode and confirm that the downloaded area still loads.
Find Hiking Trails Near Your Location
If you’re already traveling, location services can help identify nearby trails.
Hiking Project’s mobile guidance explains that location access can show your position on the map and help surface nearby trails.
This can be particularly useful during road trips when you suddenly have a few hours available for hiking.
Use It for U.S. Road Trips
Hiking Project can be especially valuable for road-trip planning.
Instead of planning only around major attractions, identify hiking opportunities along your route.
For example:
Road trip plan:
City → scenic overlook → short hike → lunch → national park → overnight destination.
A trail-planning resource can help turn a simple drive into a more active outdoor adventure.
Look for Beginner-Friendly Trails
New hikers should prioritize routes that match their experience.
A beginner-friendly hike might have:
- Manageable distance
- Moderate elevation gain
- Clear route information
- Easy trail access
- Predictable terrain
- Multiple turnaround options
Remember that “easy” on a website doesn’t guarantee an easy experience for every person.
Find More Challenging Routes
Experienced hikers can use trail information to identify routes with greater distance, elevation gain, or technical terrain.
However, difficulty ratings are not universal fitness tests.
Weather, heat, altitude, snow, trail conditions, and personal experience can dramatically change the challenge.
Explore National Park Hiking
Hiking Project includes trail information for many national park destinations and offers a dedicated national park guide.
It can help you research trails and highlights, but park management remains the final authority on closures, permits, regulations, and current conditions.
Before hiking in a national park, check the official National Park Service website for current alerts.
Check Photos for Visual Clues
Trail photos can help you understand what a route may look like.
Look for:
- Terrain
- Vegetation
- Viewpoints
- Trail width
- Rocky sections
- Seasonal scenery
Photos are useful context, but they should not be treated as proof of current conditions.
Research Parking Before You Go
Parking can make or break a hiking plan.
Check route information for parking notes, then confirm details with the official land manager when possible.
Look for:
- Parking availability
- Parking fees
- Permit requirements
- Road access
- Seasonal closures
- Shuttle requirements
Check Trail Difficulty Carefully
Difficulty labels are helpful for comparing routes, but they aren’t a substitute for understanding your own abilities.
A better approach is to combine the difficulty rating with distance, elevation gain, terrain, weather, and your group’s experience.
Build a Backup Hiking Plan
Don’t create a plan that depends on one trail being open.
Have a second option ready.
For example:
Plan A: 7-mile mountain hike
Plan B: 3-mile forest loop
Plan C: scenic viewpoint and short nature walk
This is especially useful when traveling during changing weather or busy holiday periods.
Use Hiking Project as a Research Tool, Not a Guarantee
Community-created trail information can be extremely useful, but trails change.
Storms can damage paths. Snow can cover signs. Wildfires can cause closures. Roads can close. Construction can change access.
That is why smart hikers combine Hiking Project research with official sources.
The National Park Service specifically advises hikers to check weather, park alerts, trail conditions, and closures before starting.
Save Favorite Routes
If you regularly hike or travel, saving promising routes can make future planning faster.
Create a personal collection of:
- Weekend hikes
- Family-friendly trails
- Waterfall hikes
- Mountain routes
- Sunset viewpoints
- National park trails
- Road-trip stops
Use Community Information Carefully
The community aspect is one of Hiking Project’s strengths.
Hikers can share routes, photos, and information, helping expand the database.
But community information should always be considered alongside official land-management information.
Check the Weather Separately
A beautiful trail can become unpleasant or unsafe during extreme weather.
Before leaving, check:
- Temperature
- Rain
- Thunderstorms
- Wind
- Snow
- Heat
- Visibility
- Flash-flood potential
For national parks, the National Park Service recommends checking weather and alerts and having a backup plan when conditions aren’t suitable.
Plan Around Daylight
A route that looks short on a map can take longer than expected.
Allow time for:
- Navigation
- Breaks
- Photos
- Water
- Unexpected delays
- Route-finding
Set a reasonable turnaround time rather than assuming everything will go perfectly.
Choose Trails Based on Your Group
The best hike isn’t necessarily the most difficult hike.
If you’re hiking with children, beginners, older relatives, or people with different experience levels, choose a route everyone can complete comfortably.
The National Park Service recommends choosing trails that match the abilities of everyone in your group and keeping the group together.
Research Seasonal Hiking Conditions
A trail can look completely different in spring, summer, fall, and winter.
Seasonal factors may include:
- Snow
- Ice
- Mud
- Heat
- Wildflowers
- Fallen trees
- High water
- Limited daylight
Winter hiking requires particular preparation because snow can hide the normal route and trail markers.
Contribute Useful Information
Hiking Project isn’t only about consuming information.
Experienced hikers can contribute useful route information and photographs, helping future visitors.
If you contribute, focus on accurate, practical details rather than exaggerating a trail’s difficulty or conditions.
Pair Digital Maps With Good Judgment
Technology can improve planning, but it doesn’t replace outdoor skills.
Your phone battery can run out. Weather can change. A route can be closed. A map can contain outdated information.
Always maintain situational awareness.
Use It to Discover New Places
Perhaps the biggest benefit of Hiking Project is discovery.
You may start by searching for one popular trail and end up finding several lesser-known routes nearby.
That makes it useful for travelers who want to explore beyond the most obvious attractions.
Best Features of Hiking Project at a Glance
| Feature | Why It Matters |
| Trail maps | Helps you understand the route |
| Recommended routes | Makes complete hikes easier to research |
| Elevation information | Shows how much climbing to expect |
| Trail descriptions | Adds practical route context |
| Photos | Provides visual reference |
| Offline maps | Useful when cell service is unavailable |
| Community contributions | Expands available trail information |
| National park coverage | Helps research popular U.S. destinations |
| Mobile app | Makes trail information portable |
| Free access | Makes basic trail planning accessible |
The platform currently describes its mobile app as free and available for iOS and Android, with offline functionality and no advertising.
Hiking Project vs. Other Hiking Resources
No single hiking platform should be treated as the perfect answer for every trip.
| Resource Type | Best For | Main Strength |
| Hiking Project | Trail discovery | Community trail information |
| Official park website | Current regulations | Closures, alerts and rules |
| Visitor center | Local conditions | Ranger knowledge |
| Weather service | Forecasts | Weather planning |
| Printed map | Backup navigation | Works without batteries |
| Local trail organization | Regional knowledge | Local expertise |
The smartest approach is to combine these resources.
For example, use Hiking Project to discover a route, the official park website to check current conditions, a weather service to check the forecast, and a map or navigation backup for the actual hike.
Is Hiking Project Accurate and Trustworthy?

Hiking Project can be a valuable source for trail research, but hikers should understand what it is—and what it isn’t.
It is a community-built resource. The platform itself describes Hiking Project as a guidebook-quality resource built by hikers.
That community model creates a large collection of trail information, but conditions can change after information is submitted.
How to Improve Your Research
Use a three-step verification process:
Research the route
Review Hiking Project’s map, description, photos, distance, and elevation.
Verify current conditions
Check the official land manager’s website for closures, alerts, permits, fire restrictions, and access information.
Check the weather
Look at the forecast for the actual hiking area rather than relying only on the weather in the nearest city.
This approach gives you a much stronger hiking plan than relying on one source.
How to Plan a Hike With Hiking Project
A simple planning workflow can save time and reduce surprises.
Pick Your Destination
Choose a city, national park, forest, mountain area, or other outdoor destination.
Search for Trails
Look for several routes rather than committing immediately to one.
Compare the Numbers
Review:
- Distance
- Elevation gain
- Difficulty
- Route type
- Estimated effort
Read the Details
Study descriptions, photos, parking information, and route notes.
Verify Official Information
Check the land manager for current conditions.
Check Weather
Look at the forecast and consider how it could affect terrain and timing.
Download Information
If you’re entering an area with unreliable reception, download relevant trail information before leaving connectivity.
Tell Someone Your Plan
For longer or remote hikes, leave your itinerary with a trusted person.
Pack Appropriately
Carry enough water, food, navigation tools, appropriate clothing, and other essentials for the trip.
Be Willing to Turn Around
A successful hike isn’t necessarily reaching the destination. Sometimes the smartest decision is changing the plan.
Hiking Project Safety Checklist
Before heading out, use this simple checklist:
Trail Research
- Confirm trail distance
- Check elevation gain
- Read the route description
- Study the map
- Check recent conditions where available
- Identify parking and access
Official Verification
- Check land-manager alerts
- Check trail closures
- Check permits and fees
- Review seasonal restrictions
Weather
- Check the local forecast
- Look for severe-weather alerts
- Consider heat, snow, rain or storms
- Have a backup plan
Personal Preparation
- Bring enough water
- Pack food or snacks
- Wear suitable footwear
- Carry navigation backup
- Bring appropriate clothing
- Charge your phone
Communication
- Tell someone your itinerary
- Know your expected return time
- Understand that cell service may be unavailable
The National Park Service recommends planning ahead, checking conditions, carrying appropriate equipment, and not relying solely on a cellphone because coverage may be unavailable.
Common Mistakes When Using Hiking Project

Trusting Old Information
Trail conditions can change.
Always verify important details with the responsible land manager.
Focusing Only on Mileage
Distance doesn’t tell the whole story.
Elevation, terrain, weather and fitness all matter.
Ignoring Official Closures
A route being listed online does not mean it is open today.
Official closure notices should take priority.
Assuming Cell Service Will Work
Remote trails may have weak or nonexistent coverage.
Download needed information before starting.
Starting Too Late
Give yourself enough daylight for the entire outing and unexpected delays.
Ignoring Weather
Blue skies at breakfast don’t guarantee good conditions all day.
Leaving the Group
If you’re hiking with others, stay together and communicate about pace and turnaround decisions.
Going Off Trail for Photos
Stay on designated routes whenever possible. The National Park Service notes that leaving established trails can damage natural resources and increase safety risks.
Expert Tips for Getting More From Hiking Project
Compare Three Trails
Don’t stop after finding one promising route.
Compare three options before making your final choice.
Pay Attention to Elevation
A route’s elevation profile can tell you more about difficulty than mileage alone.
Have a Shorter Alternative
Keep a shorter route nearby in case weather or timing changes.
Download Before You Leave
Don’t wait until you’re at the trailhead with poor reception.
Verify With Local Authorities
For parks and public lands, official sources are the best place to confirm closures and regulations.
Read Details, Not Just Ratings
A star rating doesn’t explain every condition you’ll encounter.
Consider the Season
A trail that is enjoyable in fall might require very different preparation in winter.
Plan for the Slowest Person
When hiking as a group, choose a pace everyone can safely maintain. NPS guidance also recommends keeping groups together and letting the slowest hiker set the pace.
Respect Other Trail Users
Follow local etiquette, yield appropriately, and avoid blocking narrow sections.
Leave No Trace
Pack out your trash, respect wildlife, and avoid damaging plants or trail surfaces.
Pros and Cons of Hiking Project
| Pros | Cons |
| Large trail database | Community information can become outdated |
| Free basic access | Not every trail has the same level of detail |
| Detailed route maps | Conditions can change quickly |
| Offline functionality | A phone should not be your only backup |
| Photos and descriptions | Difficulty ratings are subjective |
| Recommended routes | Official sources are still needed for closures |
| Useful for U.S. travel planning | Remote terrain still requires good judgment |
| Community contributions | Information quality can vary |
Overall Verdict
Hiking Project is worth using, especially if you enjoy discovering new trails or planning U.S. outdoor trips.
Its strongest role is as a research and trail-discovery tool. The best results come when you combine it with official land-manager information, weather forecasts, appropriate preparation, and sound judgment.
Is Hiking Project Good for Beginners?
Yes. Beginners can use Hiking Project to discover shorter and less demanding routes, compare trail characteristics, and learn how distance and elevation affect a hike.
However, beginners should avoid selecting a trail simply because it has a high rating.
Start with a manageable route and gradually build experience.
The National Park Service recommends choosing trails that match your abilities and the abilities of everyone in your group.
Hiking Project for National Parks and Public Lands

National parks are among the most popular destinations for hikers in the United States.
Hiking Project can help you research possible routes, but national parks and other public lands have their own rules.
Before visiting, check:
- Trail closures
- Weather alerts
- Fire restrictions
- Parking rules
- Permits
- Shuttle systems
- Wildlife advisories
- Seasonal access
- Current trail conditions
The National Park Service emphasizes checking park alerts and current conditions before hiking. Conditions can include everything from flooding and erosion to downed trees and damaged bridges.
This is particularly important because an online trail description may not reflect a change that happened recently.
Can You Use Hiking Project Without Cell Service?
Yes, the Hiking Project mobile app supports offline trail information when areas have been downloaded in advance.
The platform specifically promotes offline use, including maps and trail information, for situations where hikers lose cell service.
However, offline mapping doesn’t eliminate the need for preparation.
Your phone can still lose power or become damaged. For longer or remote hikes, consider carrying a suitable backup navigation method and knowing how to use it.
10 Hiking Ideas to Explore in the USA
Hiking Project can help you discover many types of U.S. hiking experiences.
Consider searching for:
Mountain hikes
Waterfall trails
Forest loops
Desert hikes
Coastal trails
Lake walks
National park hikes
Canyon routes
Wildflower trails
Scenic viewpoint hikes
Instead of searching only for the “best hikes,” search according to the experience you actually want.
For example, a family might prioritize an easy scenic loop, while an experienced hiker may want a longer mountain route with substantial elevation gain.
How Hiking Project Fits Into a Complete Travel Plan

A hiking app works best as one part of a larger travel strategy.
Before the Trip
Research:
- Destination
- Trails
- Weather
- Accommodation
- Transportation
- Park rules
- Parking
During the Trip
Use your trail information to:
- Navigate
- Track your planned route
- Compare alternatives
- Find nearby hiking opportunities
After the Trip
You can organize your favorite trails and contribute useful information to help other hikers.
This creates a helpful cycle where hikers both use and improve the outdoor community.
Frequently Asked Questions
What is Hiking Project used for?
Hiking Project is used to discover and research hiking trails. It provides maps, recommended routes, descriptions, photos, elevation information and other trail-planning details.
Is Hiking Project free?
Yes. Hiking Project describes its website and mobile app as free, including its core trail information and offline functionality.
Does Hiking Project work offline?
Yes. You can download areas and use relevant trail information without cell service. The platform recommends testing downloaded areas before heading out.
Is Hiking Project good for beginners?
Yes. Beginners can use it to compare routes and find hikes that match their experience. However, trail ratings should be considered alongside distance, elevation, terrain and current conditions.
Can Hiking Project be used for national parks?
Yes. Hiking Project provides information for many national park destinations. However, hikers should always verify current closures, regulations and alerts through the official park or land-management agency.
Does Hiking Project show elevation gain?
Yes. Trail and route pages can provide elevation information, helping hikers understand how much climbing a route involves.
Can I find hiking trails near me?
Yes. The mobile app can use location services to show your position and help surface nearby trails.
Is Hiking Project a replacement for official park information?
No. It should complement official sources rather than replace them. Park websites and land managers are the better source for current closures, permits, regulations and alerts.
Does Hiking Project have community contributions?
Yes. The platform is built around contributions from hikers and outdoor enthusiasts who can share trail information, routes and photos.
What should I check before using a Hiking Project route?
Check the route’s distance, elevation, description and map, then verify current weather, closures, access, permits and hazards through the appropriate official source.
Conclusion
Hiking Project is a valuable resource for discovering trails, researching routes, checking elevation, exploring maps, and planning outdoor adventures across the USA. Whether you are a beginner looking for an easy nature walk or an experienced hiker searching for a challenging mountain route, it can make the planning process faster and more organized.
For the best experience, don’t rely on one source alone. Use Hiking Project to explore and compare trails, then check official land-management websites for current closures, permits, weather conditions, and local safety information. Download important maps before entering areas with limited cell service, pack according to the trail and season, and always be prepared to change your plans when conditions require it.
Read More:Find Your Next Adventure: 25 Epic Travel Ideas, Planning Tips & USA Destinations for 2026